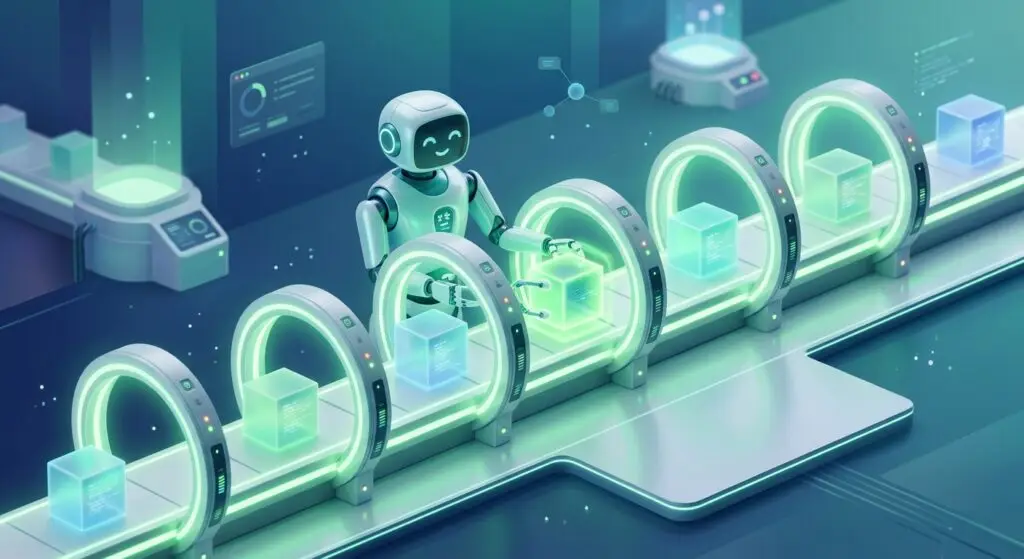

The first time someone mentions a CI/CD pipeline, it can sound like heavy enterprise machinery reserved for big teams. It is not. At its core, a CI/CD pipeline is a simple, friendly idea: let a robot run your tests and ship your code so you do not have to do it by hand and hope you did not forget a step. This beginner’s guide explains what a CI/CD pipeline actually is, walks through its four stages, shows a complete real-world example, and compares the major tools — so you can set one up with confidence.
What is a CI/CD pipeline?
A CI/CD pipeline is an automated sequence of steps that takes your code from a commit all the way to production. The name comes from two practices working together. CI is Continuous Integration: every time someone pushes code, an automated system builds it and runs the tests, so integration problems surface immediately instead of festering. CD is Continuous Delivery (or Deployment): once the tests pass, the system automatically prepares — or actually performs — the release.
Put simply: CI makes sure your code works; CD gets that working code to your users. The “pipeline” is just the assembly line connecting the two — a defined path every change flows through, usually described in a YAML file that lives right in your repository.
The 4 stages of a CI/CD pipeline
Almost every CI/CD pipeline, from a solo side project to a giant enterprise system, is built from the same four canonical stages. Each one is a gate: the pipeline only advances to the next stage if the current one succeeds.
1. Source. The pipeline begins when something changes in your source control — typically a push or a merged pull request. This is the trigger. Your CI system watches the repository and, the moment a commit lands, checks out that exact version of the code and kicks off the run. Nothing happens until code changes, and every run is tied to a specific commit, so you always know exactly what was tested.
2. Build. Next the pipeline turns your source into something runnable: compiling code, installing dependencies, bundling front-end assets, or packaging everything into a Docker image. The output is an artifact — a single, versioned, deployable thing. Building here, in a clean automated environment, catches the classic “it compiles on my machine but not the server” problem before it can reach anyone.
3. Test. Now the pipeline proves the build actually works. This stage runs your automated checks — linters and formatters, unit tests, integration tests, sometimes end-to-end tests — and it is the heart of Continuous Integration. If anything fails, the pipeline stops cold and the change is blocked. This is the gate that keeps broken code out of production, automatically, every single time.
4. Deploy. If the build and tests pass, the pipeline releases the artifact — to a staging environment, to production, or both. Depending on your setup, this either happens automatically or waits for a human to approve it (the distinction between Continuous Deployment and Continuous Delivery, which we’ll unpack shortly). Good deploy stages also make it easy to roll back if something slips through.
Why a CI/CD pipeline changes how you work
The real payoff is confidence. When every push is automatically built and tested, small changes stop being scary. You merge more often, in smaller pieces, because the safety net is always on. Bugs are caught minutes after they are introduced — while the change is still fresh in your mind — instead of weeks later during a frantic manual release. And because the pipeline performs the exact same steps every time, “it worked when I deployed it” stops depending on whether someone remembered step four at 6pm on a Friday. The machine remembers.
A complete CI/CD pipeline example (GitHub Actions)
Enough theory — here is a real, complete pipeline. This GitHub Actions workflow lives at .github/workflows/ci.yml in your repo and covers all four stages for a typical Node.js app: it checks out the code, installs dependencies, lints, tests, builds, and then deploys only when changes land on main.
name: CI/CD

on:
  push:
    branches: [main]
  pull_request:            # also run on every PR

jobs:
  build-and-test:          # --- CI: Source, Build, Test ---
    runs-on: ubuntu-latest
    steps:
      - uses: actions/checkout@v4          # 1. Source: grab the commit
      - uses: actions/setup-node@v4
        with:
          node-version: 20
          cache: npm                       # cache deps -> faster runs
      - run: npm ci                        # install exactly the lockfile
      - run: npm run lint                  # 3. Test: static checks
      - run: npm test                      # 3. Test: unit tests
      - run: npm run build                 # 2. Build: produce the artifact

  deploy:                  # --- CD: Deploy ---
    needs: build-and-test                  # only if everything above passed
    if: github.ref == 'refs/heads/main'    # deploy only from main, not PRs
    runs-on: ubuntu-latest
    steps:
      - uses: actions/checkout@v4
      - run: ./scripts/deploy.sh
        env:
          DEPLOY_TOKEN: ${{ secrets.DEPLOY_TOKEN }}   # from encrypted secrets
Read it top to bottom and the whole model clicks. The on: block is the Source trigger — this runs on every push to main and on every pull request. The build-and-test job is your CI: install, lint, test, build, all in a fresh Ubuntu machine. The deploy job is your CD, and two lines make it safe: needs: build-and-test means it only runs if CI passed, and the if: condition means pull requests get tested but never deployed — only real merges to main ship. The deploy token comes from GitHub’s encrypted secrets, never from the file itself. That is a genuinely production-shaped pipeline in about twenty lines, and you can start with just the first job and add deploy later.
Continuous delivery vs continuous deployment
The two CDs get used interchangeably, but they name genuinely different levels of automation, and teams argue about which to adopt. Continuous Delivery means every change that passes the pipeline is ready to deploy — packaged, tested, releasable — but a human presses the final button. Continuous Deployment removes the button: every green pipeline run goes straight to production automatically, sometimes dozens of times a day.
Continuous Deployment sounds terrifying until you notice what it forces: if every merge ships, merges become small, tests become serious, and rollback becomes routine — the scary big-bang release stops existing because there’s no batch to accumulate. That said, Delivery-with-a-button is a perfectly respectable end state, especially where releases need coordination (mobile app stores, regulated industries, marketing-timed launches). The anti-pattern isn’t the manual button; it’s the manual everything else around it.
How long should a CI/CD pipeline take?
Here is a metric worth tattooing on the wall: keep your pipeline under ten minutes. This number matters more than beginners expect, because pipeline speed and developer behavior are directly linked. A fast pipeline gets used the way it’s meant to — developers push small changes often and wait for the green check before moving on. A slow one quietly poisons the whole practice: people batch up changes to avoid the wait, start context-switching to other tasks mid-run, and gradually stop paying attention to results. The safety net only works if people actually look at it.
Three techniques keep pipelines fast without cutting coverage. Cache dependencies between runs — every platform supports it, and it often halves the time. Parallelize independent jobs so linting, unit tests, and type-checking run at once instead of in sequence. And move the genuinely slow work — full end-to-end suites, heavy security scans — to a nightly schedule or a separate stage rather than blocking every commit on it. Optimize for the common case: the check that runs on every push should be lean; the exhaustive checks can run less often.
CI/CD tools compared: GitHub Actions vs GitLab CI vs Jenkins vs CircleCI
The four tools you’ll hear about most each suit different situations. For a beginner, the honest advice is usually “use whatever’s built into where your code already lives” — but here’s how they actually compare:
| Tool | Hosting | Best for | Learning curve | Config |
|---|---|---|---|---|
| GitHub Actions | Hosted (SaaS) | Projects already on GitHub | Gentle | YAML in .github/workflows |
| GitLab CI/CD | Hosted or self-hosted | All-in-one GitLab teams | Gentle–moderate | .gitlab-ci.yml |
| Jenkins | Self-hosted | Enterprises needing full control | Steep | Groovy Jenkinsfile + plugins |
| CircleCI | Hosted (SaaS) | Speed-focused, multi-platform | Moderate | .circleci/config.yml |
The practical takeaway: if your code is on GitHub, GitHub Actions is the path of least resistance — no separate service to set up, a huge marketplace of pre-built actions, and a generous free tier. GitLab users get an equally integrated experience with GitLab CI/CD. CircleCI is a strong independent choice known for speed and flexible configuration when you want a dedicated CI service. And Jenkins — the self-hosted veteran — trades a steep learning curve and maintenance burden for near-limitless customization, which mostly pays off for large organizations with special infrastructure needs. It is rarely the right first choice today. Start hosted, start simple; you can always graduate.
Growing your pipeline: what to add after tests
Once tests-on-every-push feels normal, pipelines grow in a fairly standard order, each stage catching a class of problem earlier:
- Linting and formatting checks — end the code-style debates by making a robot the arbiter, enforcing clean-code habits automatically.
- Type checking — for TypeScript/mypy projects, a stage that catches what tests don’t cover.
- Build verification — actually produce the artifact (bundle, Docker image) so “it doesn’t compile” can’t reach main.
- Preview deployments — spin up a temporary environment per pull request so reviewers click through real changes instead of imagining them from diffs.
- Security scanning — dependency audit and secret detection, cheap insurance that runs while you sleep.
Resist adding everything at once. Each stage adds minutes to every push, and — as we just covered — a slow pipeline quietly erodes the merge-often habit that made CI valuable in the first place. Add a stage, feel its value, then add the next.
When the pipeline fails: culture beats tooling
The unglamorous truth about CI/CD is that its value depends on one social rule: a red pipeline is everyone’s top priority. Teams that let failures sit (“oh, that test is just flaky, re-run it”) train themselves to ignore the robot, and within months the safety net is theater. Flaky tests deserve fixing or deleting — an unreliable alarm is worse than no alarm, because it costs attention while protecting nothing. The healthiest habit: when your push breaks the build, you fix it or revert it immediately, no shame attached. The pipeline exists precisely so mistakes are cheap, caught in minutes, and fixed while context is fresh. The best tooling in the world can’t save a team that has learned to ignore a red X.
Frequently asked questions
What is a CI/CD pipeline in simple terms? It’s an automated assembly line for your code. When you push a change, the pipeline automatically builds it, runs the tests, and — if everything passes — ships it. It replaces the slow, error-prone manual steps of releasing software with a repeatable process a machine performs the same way every time.
What are the stages of a CI/CD pipeline? The four canonical stages are Source (a commit triggers the run), Build (compile and package the code into an artifact), Test (run linters and automated tests as a quality gate), and Deploy (release the artifact to staging or production). Each stage only runs if the previous one succeeds.
Do I need CI/CD for a solo project? More than you’d think. The robot doesn’t just protect you from teammates — it protects you from Friday-you pushing without running tests, and it makes every deploy identical instead of dependent on remembering steps. A ten-line GitHub Actions file pays for itself the first time it catches something.
What’s the difference between continuous delivery and continuous deployment? Both automate everything up to release. With continuous delivery, the release is ready but a human presses the final deploy button. With continuous deployment, that button is gone — every change that passes the pipeline ships to production automatically.
Which CI/CD tool should a beginner use? Start with whatever is built into where your code already lives — GitHub Actions for GitHub, GitLab CI/CD for GitLab. They require no separate setup and cover the vast majority of needs. Reach for Jenkins or a dedicated service like CircleCI only when you hit a specific limitation.
How do secrets like deploy keys work in CI? Every platform provides an encrypted secrets store; you add values in the settings UI and reference them as environment variables in the pipeline. They never live in the YAML file — the same keep-secrets-out-of-Git discipline applies doubly to the robot with production access.
The takeaway
A CI/CD pipeline is just automation for the boring, error-prone parts of shipping software: source, build, test, deploy, run the same way every time. Begin with a pipeline that simply tests every push, keep it under ten minutes, grow it as your needs grow, and treat a red build as everyone’s problem. Do that, and you get the quiet confidence of knowing a tireless robot checks your work before your users ever see it — which, once you’ve felt it, is very hard to give up.



The simplest I have ever seen explained.