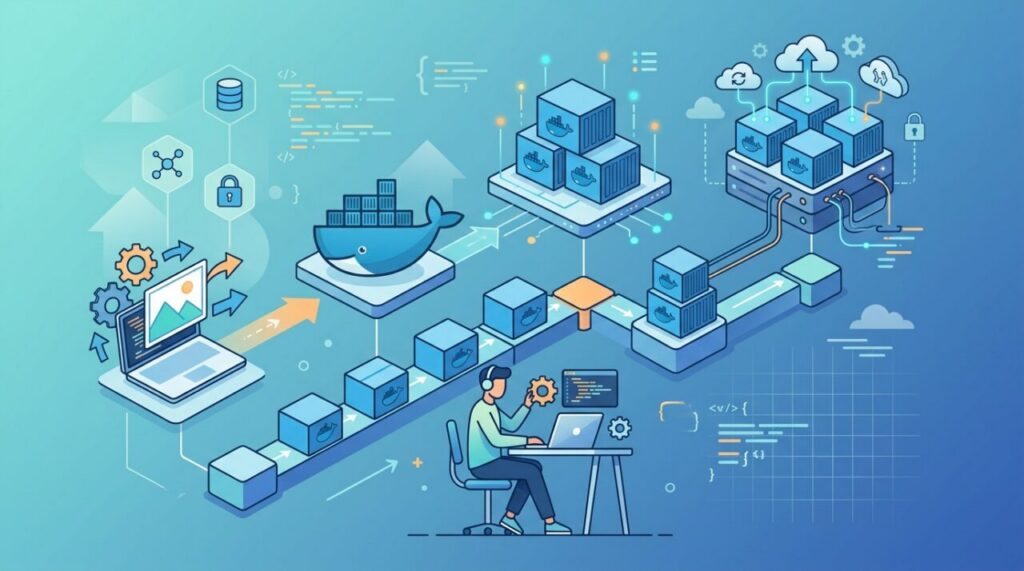

Unlock the power of containerization with our step-by-step guide to Docker. Perfect for beginners, this article simplifies the journey to mastering Docker containers.
Mastering Docker Containers: A Step-by-Step Guide for Beginners
Unlock the power of containerization with our step-by-step guide to Docker. Perfect for beginners, this article simplifies the journey to mastering Docker containers.
Why Use Docker? Benefits for Developers and Operations
Docker has revolutionized the way applications are developed, shipped, and run. For developers, Docker provides a consistent environment across multiple stages of development, from coding to testing to production. This consistency mitigates the “it works on my machine” problem, ensuring that the application will behave the same regardless of where it is run. For operations teams, Docker makes it easier to manage applications and dependencies, reducing conflicts and simplifying deployments.
Another significant advantage is the speed and efficiency of Docker containers. Unlike virtual machines, which require a full operating system to run, Docker containers share the host system’s kernel. This results in faster startup times and lower overhead. Developers can quickly spin up containers for testing and development, leading to shorter development cycles and quicker iterations.
Docker also excels in scalability and resource utilization. With Docker, you can run multiple containers on a single host, efficiently utilizing system resources. This capability makes it ideal for microservices architecture, where applications are broken down into smaller, manageable services. By using Docker, you can easily scale individual components of your application to meet demand, ensuring better performance and reliability.
Understanding Docker Architecture
To fully appreciate the power of Docker, it is essential to understand its architecture. At the core of Docker is the Docker Engine, which is responsible for creating, managing, and running containers. The Docker Engine consists of three main components: the Docker Daemon, the Docker Client, and the Docker Registry. The Docker Daemon runs on the host machine and manages Docker objects such as images, containers, networks, and volumes. The Docker Client is the command-line interface used to interact with the Docker Daemon. Finally, the Docker Registry is where Docker images are stored and distributed.
Docker containers are built from Docker images, which are read-only templates that include the application code, runtime, libraries, and dependencies. These images are created using Dockerfiles, which are simple text files that specify the instructions for building an image. Once an image is created, it can be pushed to a Docker Registry, such as Docker Hub, for sharing and distribution. When you run a container, Docker uses the image to create a writable layer on top of the read-only layers, allowing the container to execute and make changes.
Networking in Docker is handled through Docker networks, which enable containers to communicate with each other and the outside world. Docker provides different network drivers, such as bridge, host, and overlay, to cater to various networking needs. Additionally, Docker volumes are used for persistent storage, allowing data to persist even after a container is stopped or removed. Understanding these core components of Docker architecture is crucial for effectively working with Docker containers.
Installing Docker on Different Operating Systems
Installing Docker is the first step to getting started with containerization. Docker provides installation packages for various operating systems, including Windows, macOS, and Linux. In this section, we will walk you through the installation process for each operating system.
Installing Docker on Windows
To install Docker on Windows, you need to download Docker Desktop from the official Docker website. Once downloaded, run the installer and follow the on-screen instructions. Docker Desktop requires Windows 10 Pro or Enterprise with Hyper-V and Containers features enabled. During the installation, Docker Desktop will automatically configure these features for you. After the installation is complete, you can launch Docker Desktop and start using Docker from the command line.
Installing Docker on macOS
For macOS users, Docker Desktop is also the preferred installation method. Download the Docker Desktop for Mac from the Docker website and open the downloaded .dmg file. Drag the Docker icon to the Applications folder to install Docker. Once installed, you can launch Docker Desktop from the Applications folder. Docker Desktop for Mac requires macOS 10.13 or newer. After launching Docker Desktop, you can use the Docker command-line interface (CLI) to interact with Docker.
Installing Docker on Linux
Installing Docker on Linux varies depending on the distribution you are using. For example, on Ubuntu, you can install Docker by running the following commands: sudo apt-get update sudo apt-get install -y apt-transport-https ca-certificates curl software-properties-common curl -fsSL https://download.docker.com/linux/ubuntu/gpg | sudo apt-key add - sudo add-apt-repository "deb [arch=amd64] https://download.docker.com/linux/ubuntu $(lsb_release -cs) stable" sudo apt-get update sudo apt-get install -y docker-ce sudo systemctl start docker sudo systemctl enable docker
For other Linux distributions, refer to the Docker documentation for specific installation instructions. Once Docker is installed, you can verify the installation by running the docker --version command.
Creating Your First Docker Container
With Docker installed, you are ready to create your first Docker container. In this section, we will guide you through the process of creating and running a simple Docker container.
The first step is to pull a Docker image from a Docker Registry. For this example, we will use the hello-world image, which is a minimal Docker image designed for testing Docker installations. To pull the image, run the following command: docker pull hello-world
Once the image is downloaded, you can create and run a container using the docker run command: docker run hello-world
When you run this command, Docker will create a new container from the hello-world image and execute it. The container will print a message to the console and then exit. This simple example demonstrates the basic workflow of pulling an image, creating a container, and running it.
To see a list of running containers, you can use the docker ps command. If you want to see all containers, including those that have stopped, use the docker ps -a command. This command will display information about each container, such as its ID, image, status, and command.
Managing Docker Containers: Start, Stop, and Remove
Managing Docker containers involves starting, stopping, and removing containers as needed. In this section, we will cover the commands used to manage the lifecycle of Docker containers.
To start a stopped container, use the docker start command followed by the container ID or name. For example: docker start <container_id_or_name>
To stop a running container, use the docker stop command: docker stop <container_id_or_name>
Stopping a container gracefully shuts it down, allowing any ongoing processes to complete. If you need to forcefully stop a container, use the docker kill command: docker kill <container_id_or_name>
To remove a stopped container, use the docker rm command: docker rm <container_id_or_name>
If you want to remove a running container, you must stop it first or use the -f (force) flag with the docker rm command: docker rm -f <container_id_or_name>
Managing Docker containers also involves inspecting and viewing logs. The docker inspect command provides detailed information about a container, including its configuration and state: docker inspect <container_id_or_name>
To view logs from a container, use the docker logs command: docker logs <container_id_or_name>
By mastering these commands, you can effectively manage the lifecycle of Docker containers, ensuring smooth and efficient operation.
Docker Images: Building and Managing Your Own
Docker images are the building blocks of Docker containers. In this section, we will explore how to build and manage your own Docker images using Dockerfiles.
A Dockerfile is a simple text file that contains a series of instructions for building a Docker image. Each instruction in the Dockerfile creates a layer in the image. Here is an example of a basic Dockerfile for a Node.js application:
“`Dockerfile
Set the working directory in the container
WORKDIR /app
Copy package.json and package-lock.json
COPY package*.json ./
Install dependencies
RUN npm install
Copy the rest of the application code
COPY . .
Expose the application port
EXPOSE 3000
Start the application
CMD [“node”, “server.js”] To build a Docker image from this Dockerfile, use the `docker build` command:
docker build -t my-node-app . This command will build the image and tag it as `my-node-app`. Once the image is built, you can create and run a container from it:
docker run -p 3000:3000 my-node-app This command maps port 3000 on the host to port 3000 in the container, allowing you to access the application from your browser. Managing Docker images involves listing, tagging, and removing images. To see a list of available images, use the `docker images` command. To tag an image with a new tag, use the `docker tag` command:
docker tag my-node-app my-node-app:v1.0 To remove an image, use the `docker rmi` command:
docker rmi my-node-app
“`
Building and managing Docker images allows you to create customized environments for your applications, ensuring consistency and reproducibility.
Networking in Docker: Connecting Containers
Networking is a crucial aspect of working with Docker, especially when dealing with multi-container applications. Docker provides several network drivers to facilitate communication between containers and the outside world.
Bridge Network
The default network driver in Docker is the bridge network. When you create a new container without specifying a network, Docker connects it to the default bridge network. Containers on the same bridge network can communicate with each other using their IP addresses or container names. To create a custom bridge network, use the docker network create command: docker network create my-bridge-network
You can then run containers on this network using the --network flag: docker run --network my-bridge-network --name my-container my-image
Host Network
The host network driver allows a container to share the host’s network stack. This means the container has direct access to the host’s network interfaces. To run a container using the host network, use the --network host flag: docker run --network host my-image
Overlay Network
The overlay network driver is used for multi-host networking, allowing containers on different Docker hosts to communicate. This is particularly useful for Docker Swarm and Kubernetes. To create an overlay network, use the docker network create command with the --driver overlay flag: docker network create --driver overlay my-overlay-network
In addition to these network drivers, Docker provides other networking features such as DNS resolution, port mapping, and network aliases. By mastering Docker networking, you can ensure seamless communication between your containers and the outside world.
Best Practices for Working with Docker
To get the most out of Docker, it is essential to follow best practices. In this section, we will discuss some best practices for working with Docker containers and images.
Keep Images Lightweight
One of the key benefits of Docker is the ability to create lightweight containers. To achieve this, use minimal base images and avoid installing unnecessary packages. For example, instead of using the full Node.js image, use the node:alpine image, which is much smaller. Additionally, use multi-stage builds to keep your final image size small by separating the build environment from the runtime environment.
Use Environment Variables
Environment variables are a convenient way to configure your containers without modifying the image. Use the ENV instruction in your Dockerfile to set default environment variables, and override them at runtime using the -e flag with the docker run command. This approach ensures that your containers are easily configurable and portable.
Implement Health Checks
Health checks are a valuable feature in Docker that allows you to monitor the health of your containers. Use the HEALTHCHECK instruction in your Dockerfile to define a command that Docker will run periodically to check the health of the container. If the health check fails, Docker can automatically restart the container to recover from failures.
Use Volumes for Persistent Storage
Containers are ephemeral, meaning they do not persist data by default. Use Docker volumes to store data persistently. Volumes allow you to share data between containers and the host, and they persist even after the container is removed. Use the -v flag with the docker run command to mount a volume: docker run -v my-volume:/data my-image
Follow Security Best Practices
Security is crucial when working with Docker. Follow security best practices such as running containers as non-root users, using trusted images, and regularly updating your images. Additionally, use Docker’s built-in security features such as namespaces, cgroups, and AppArmor to isolate and secure your containers.
By following these best practices, you can ensure that your Docker environment is efficient, secure, and maintainable.
Conclusion and Next Steps in Your Docker Journey
Congratulations! You have taken the first steps towards mastering Docker containers. In this guide, we have covered the fundamentals of Docker, including its benefits, architecture, installation, container management, image building, networking, and best practices. With this knowledge, you are well-equipped to start using Docker in your development and operations workflows.
As you continue your Docker journey, consider exploring advanced topics such as Docker Compose, Docker Swarm, and Kubernetes. Docker Compose allows you to define multi-container applications using a simple YAML file, making it easier to manage complex applications. Docker Swarm and Kubernetes provide orchestration and management capabilities for running containers at scale.
Additionally, take advantage of the wealth of resources available in the Docker community. The official Docker documentation is an excellent starting point for learning more about Docker features and best practices. Online forums, blogs, and tutorials are also valuable sources of information and support.
By continuing to learn and experiment with Docker, you will unlock the full potential of containerization and take your development and operations workflows to the next level. Happy Dockerizing!